Home Fundamentals Research Data Management FAIR Data Principles Metadata Ontologies Data Sharing Data Publications Data Management Plan Version Control & Git Public Data Repositories Persistent Identifiers Electronic Lab Notebooks (ELN) DataPLANT Implementations Annotated Research Context User Journey ARC specification ARC Commander QuickStart QuickStart (Experts) Swate QuickStart Walk-through Best Practices For Data Annotation DataHUB DataPLAN Ontology Service Landscape ARC Commander Manual Setup Git Installation ARC Commander Installation Windows MacOS Linux ARC Commander DataHUB Access Before we start Central Functions Initialize Clone Connect Synchronize Configure Branch ISA Metadata Functions ISA Metadata Investigation Study Assay Update Export ARCitect Manual Installation - Windows Installation - macOS Installation - Linux QuickStart QuickStart - Videos ARCmanager Manual What is the ARCmanager? How to use the ARCmanager Swate Manual Swate Installation Excel Browser Excel Desktop Windows – installer Windows – manually macOS – manually Organization-wide Core Features Annotation tables Building blocks Building Block Types Adding a Building Block Using Units with Building Blocks Filling cells with ontology terms Advanced Term Search Templates File Picker Expert Features Contribute Templates ISA-JSON DataHUB Manual Overview User Settings Generate a Personal Access Token (PAT) Projects Panel ARC Panel Forks Working with files ARC Settings ARC Wiki Groups Panel Create a new user group Data publications Passing Continuous Quality Control Submitting ARCs with ARChigator Track publication status Use your DOIs Guides ARC User Journey Create your ARC ARC Commander QuickStart ARC Commander QuickStart (Experts) ARCitect QuickStart Annotate Data in your ARC Annotation Principles ISA File Types Best Practices For Data Annotation Swate QuickStart Swate Walk-through Share your ARC Register at the DataHUB DataPLANT account Invite collaborators to your ARC Sharing ARCs via the DataHUB Work with your ARC Using ARCs with Galaxy Computational Workflows CWL Introduction CWL runner installation CWL Examples CWL Metadata Recommended ARC practices Syncing recommendation Keep files from syncing to the DataHUB Working with large data files Adding external data to the ARC ARCs in Enabling Platforms Publication to ARC Troubleshooting Git Troubleshooting Contribute Swate Templates Knowledge Base Teaching Materials Events 2023 Nov: CEPLAS PhD Module Oct: CSCS CEPLAS Start Your ARC Sept: MibiNet CEPLAS Start Your ARC July: RPTU Summer School on RDM July: Data Steward Circle May: CEPLAS Start Your ARC Series Start Your ARC Series - Videos Events 2024 CEPLAS ARC Trainings – Spring 2024 MibiNet CEPLAS DataPLANT Tool-Workshops Frequently Asked Questions

Swate Walk-through

last updated at 2024-04-24 About this guide

DataPLANT provides the tool Swate to support you in data annotation. It is both integrated into ARCitect and available as a browser version. In this walk-through, we guide you through annotating data using Swate with a show-case example.

UserNewbie ModeWalk-through

Before we can start

Create and/or open an annotation table as described in the Swate Quickstart

Swate Overview
Major areas of the Swate user interface.

Add building blocks to create your annotation table

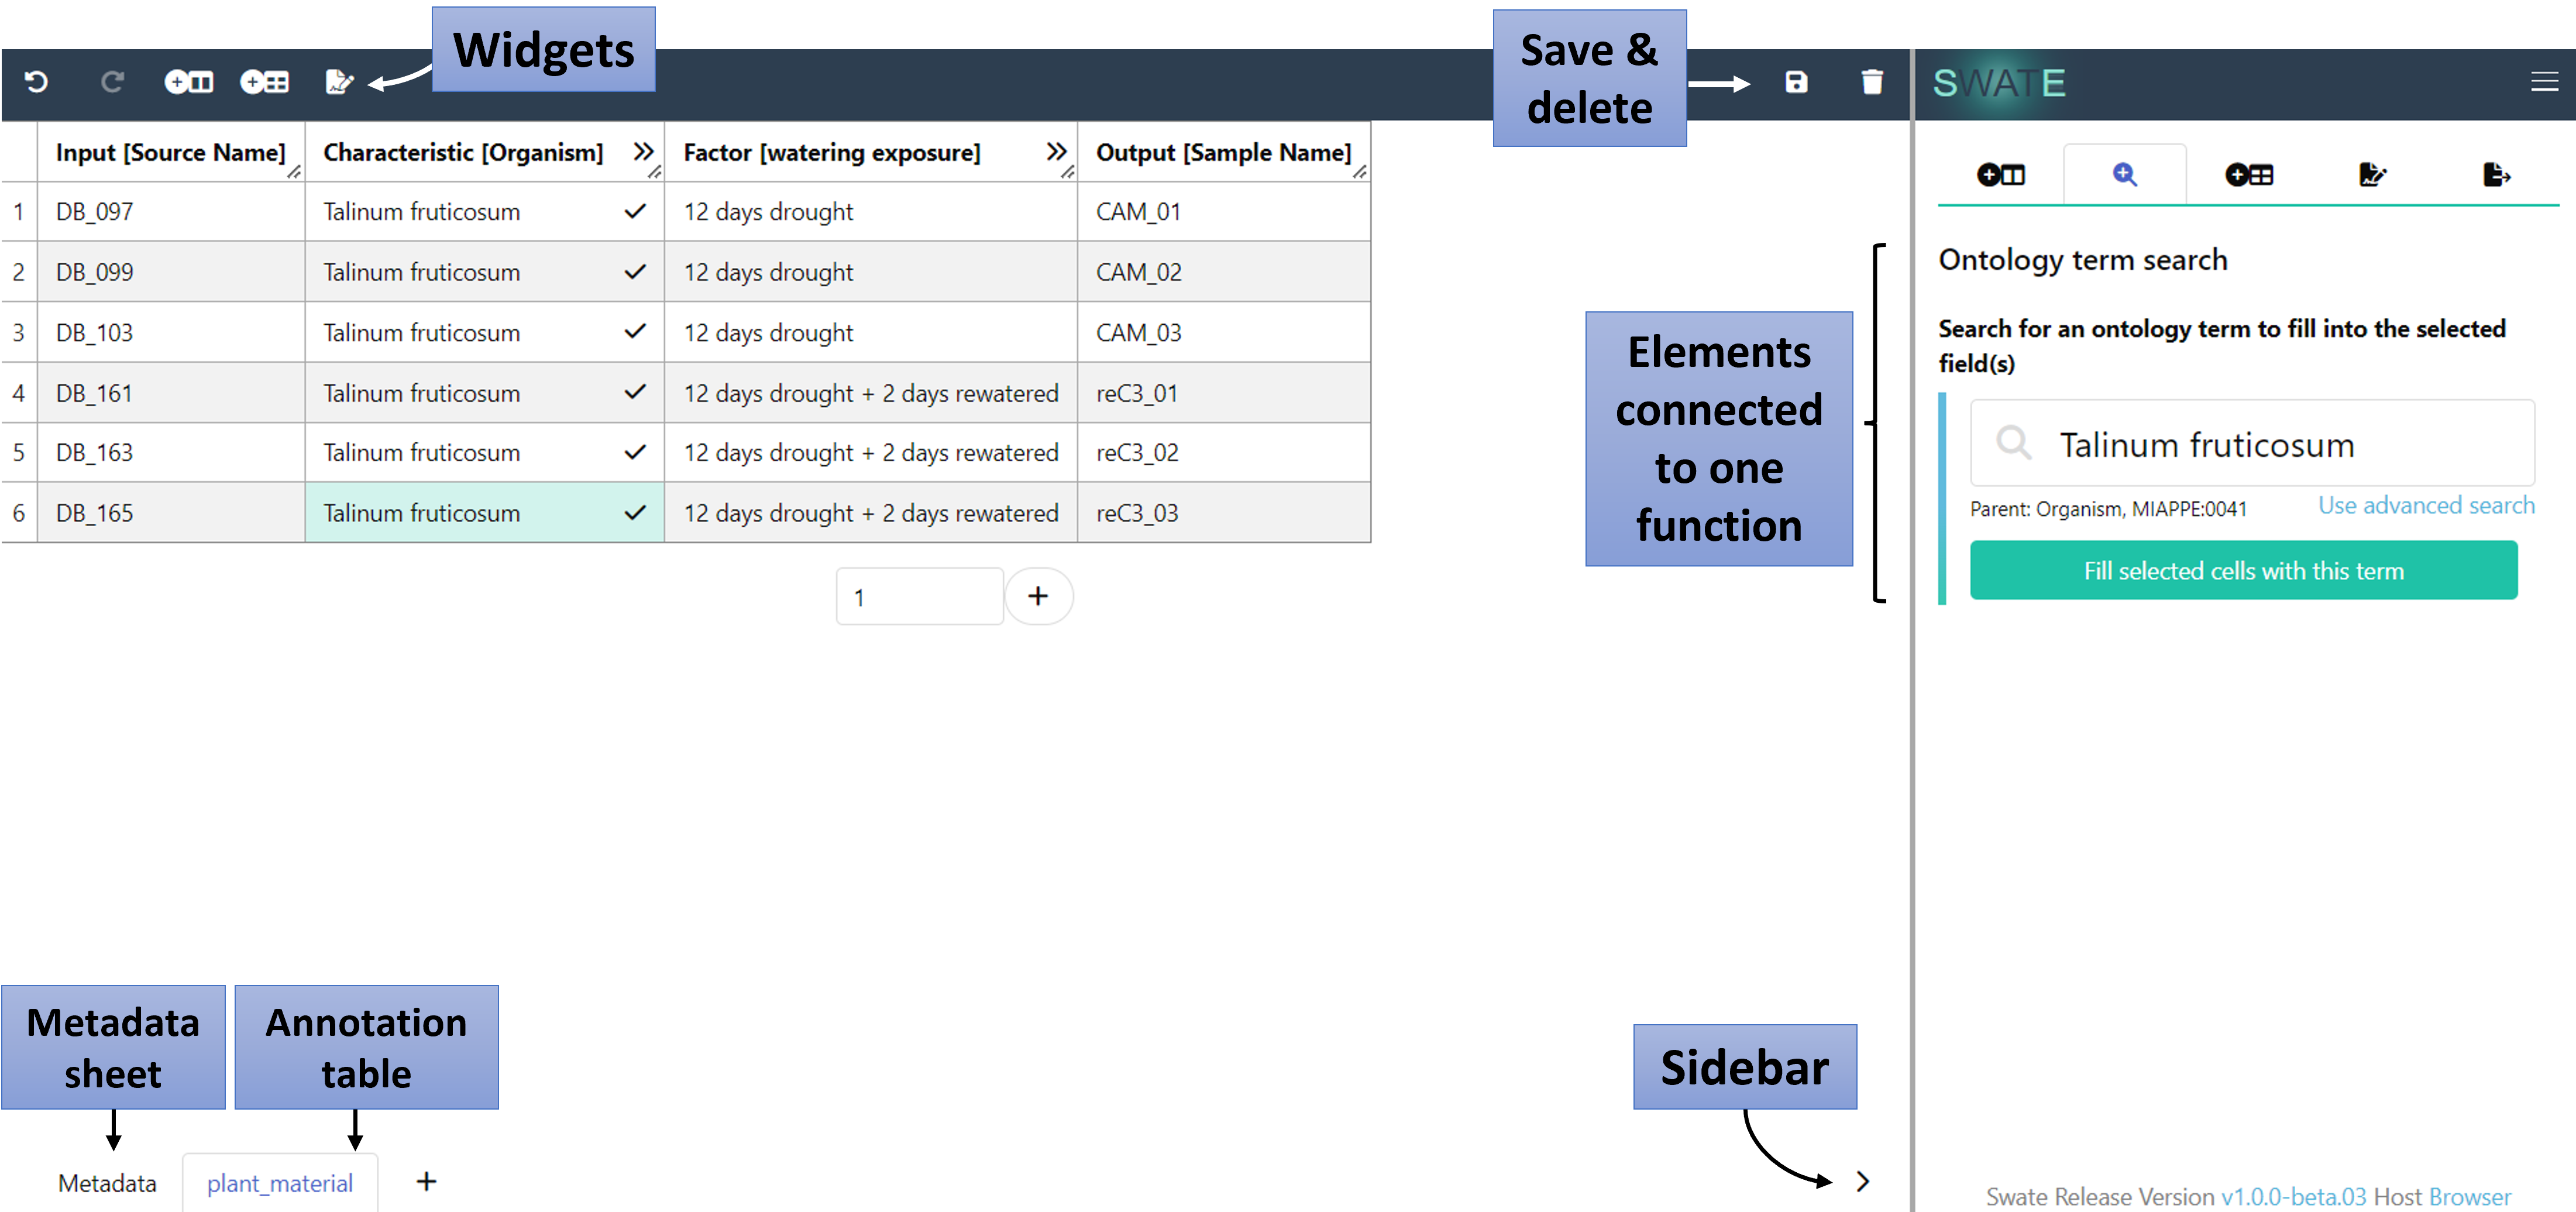
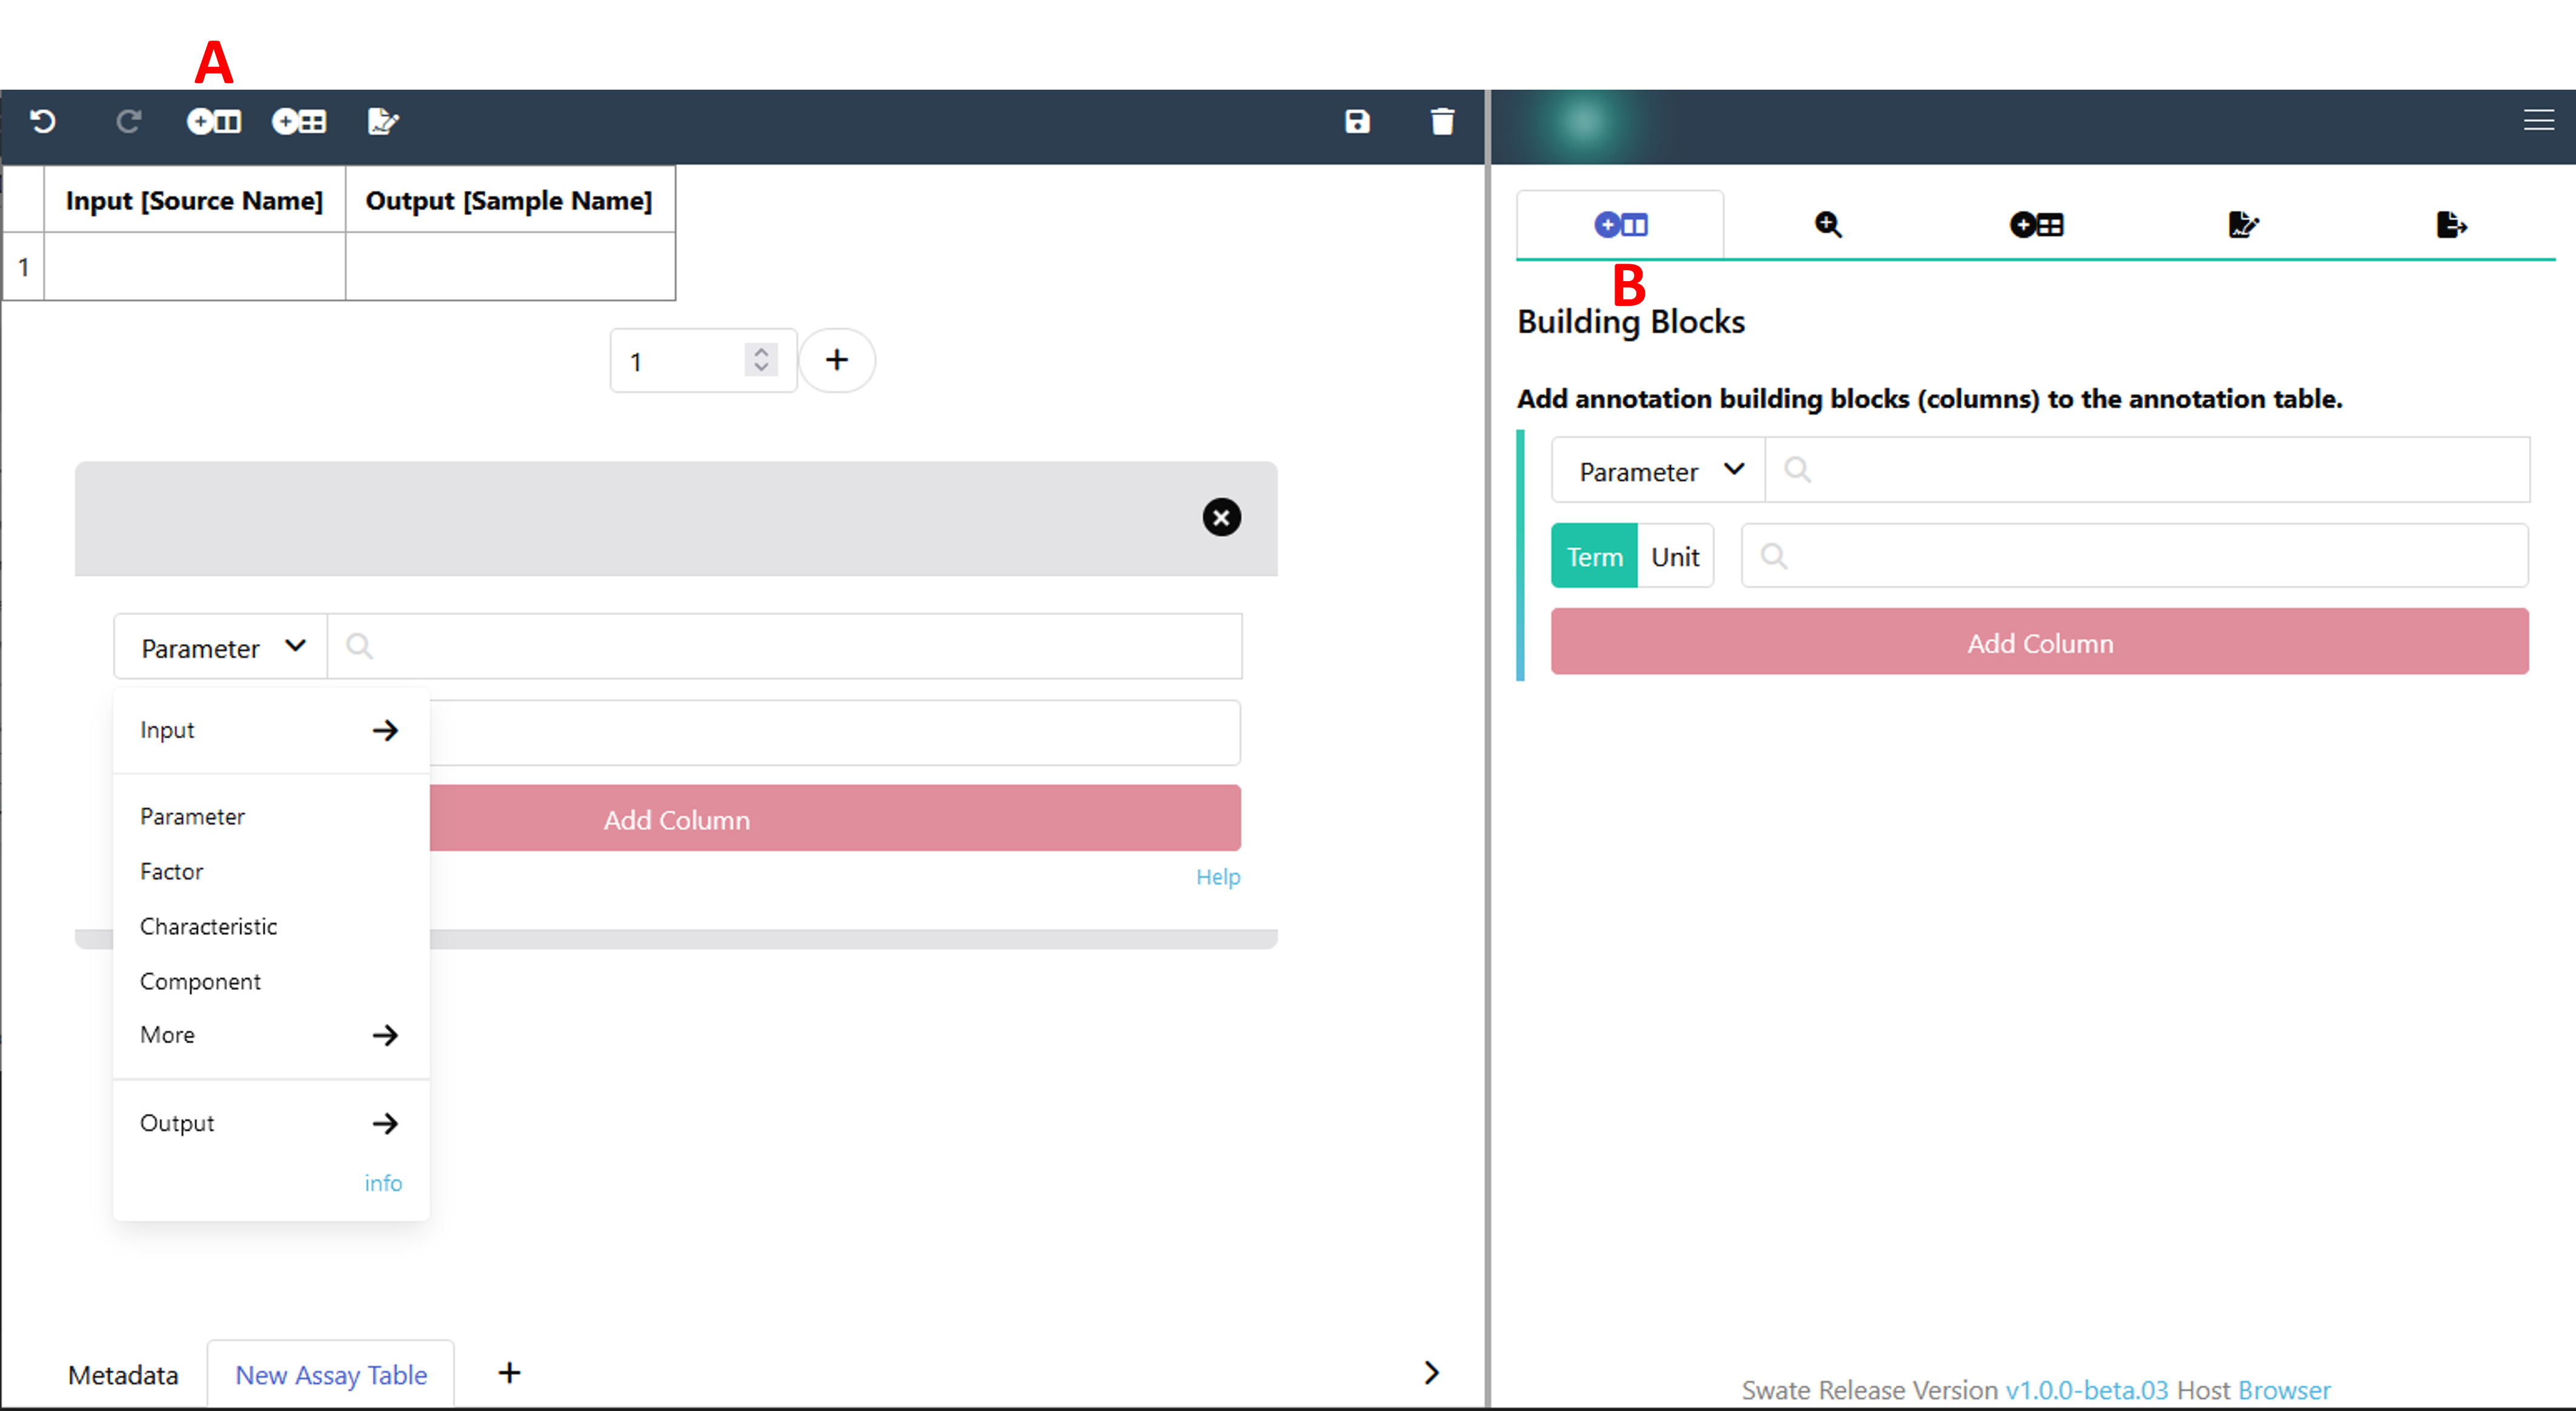
Each annotation should start with an Input and end with an Output column. To add and specify your Input building block, click either the "Add Building Block" widget on the top (A) or use the "Building Blocks" function in the sidebar (B). Select Input from the drop-down menu instead of Parameter and select Source Name as input type. Then click Add column. Add Output [Sample Name] analogously.

Alt-Text


💡 Only one Input, one Output and one of each Protocol columns can be added per table.

Now, let's add a descriptive building block.

  1. Select Component from the drop-down menu.
  2. Search for instrument model in the search bar. This search looks for suitable terms in our ontology database.
  3. Select the term with the id MS:1000031 and,
  4. Click Add column.

💡 This adds three columns to your table, one visible and two hidden. The hidden columns contain the ontology references. You can view the hidden columns by clicking the two arrows (>>) in the first column.

Add a building block with a unit
  1. In the "Building Blocks" tab, re-select Parameter, search for sample volume and select the term with id MS:1000005.
  2. Activate the "Unit" box and search for microliter in the adjacent search bar.
  3. Select UO:0000101.
  4. Click Add column.

💡 This adds four columns to your table, one visible and three hidden. When filling any cell below Parameter [sample volume] you can now see the numbers being complemented with the chosen unit, e.g. 10.00 microliter.

Change the order of your columns or delete columns

At this point, your table should look similar to this:

Alt-Text

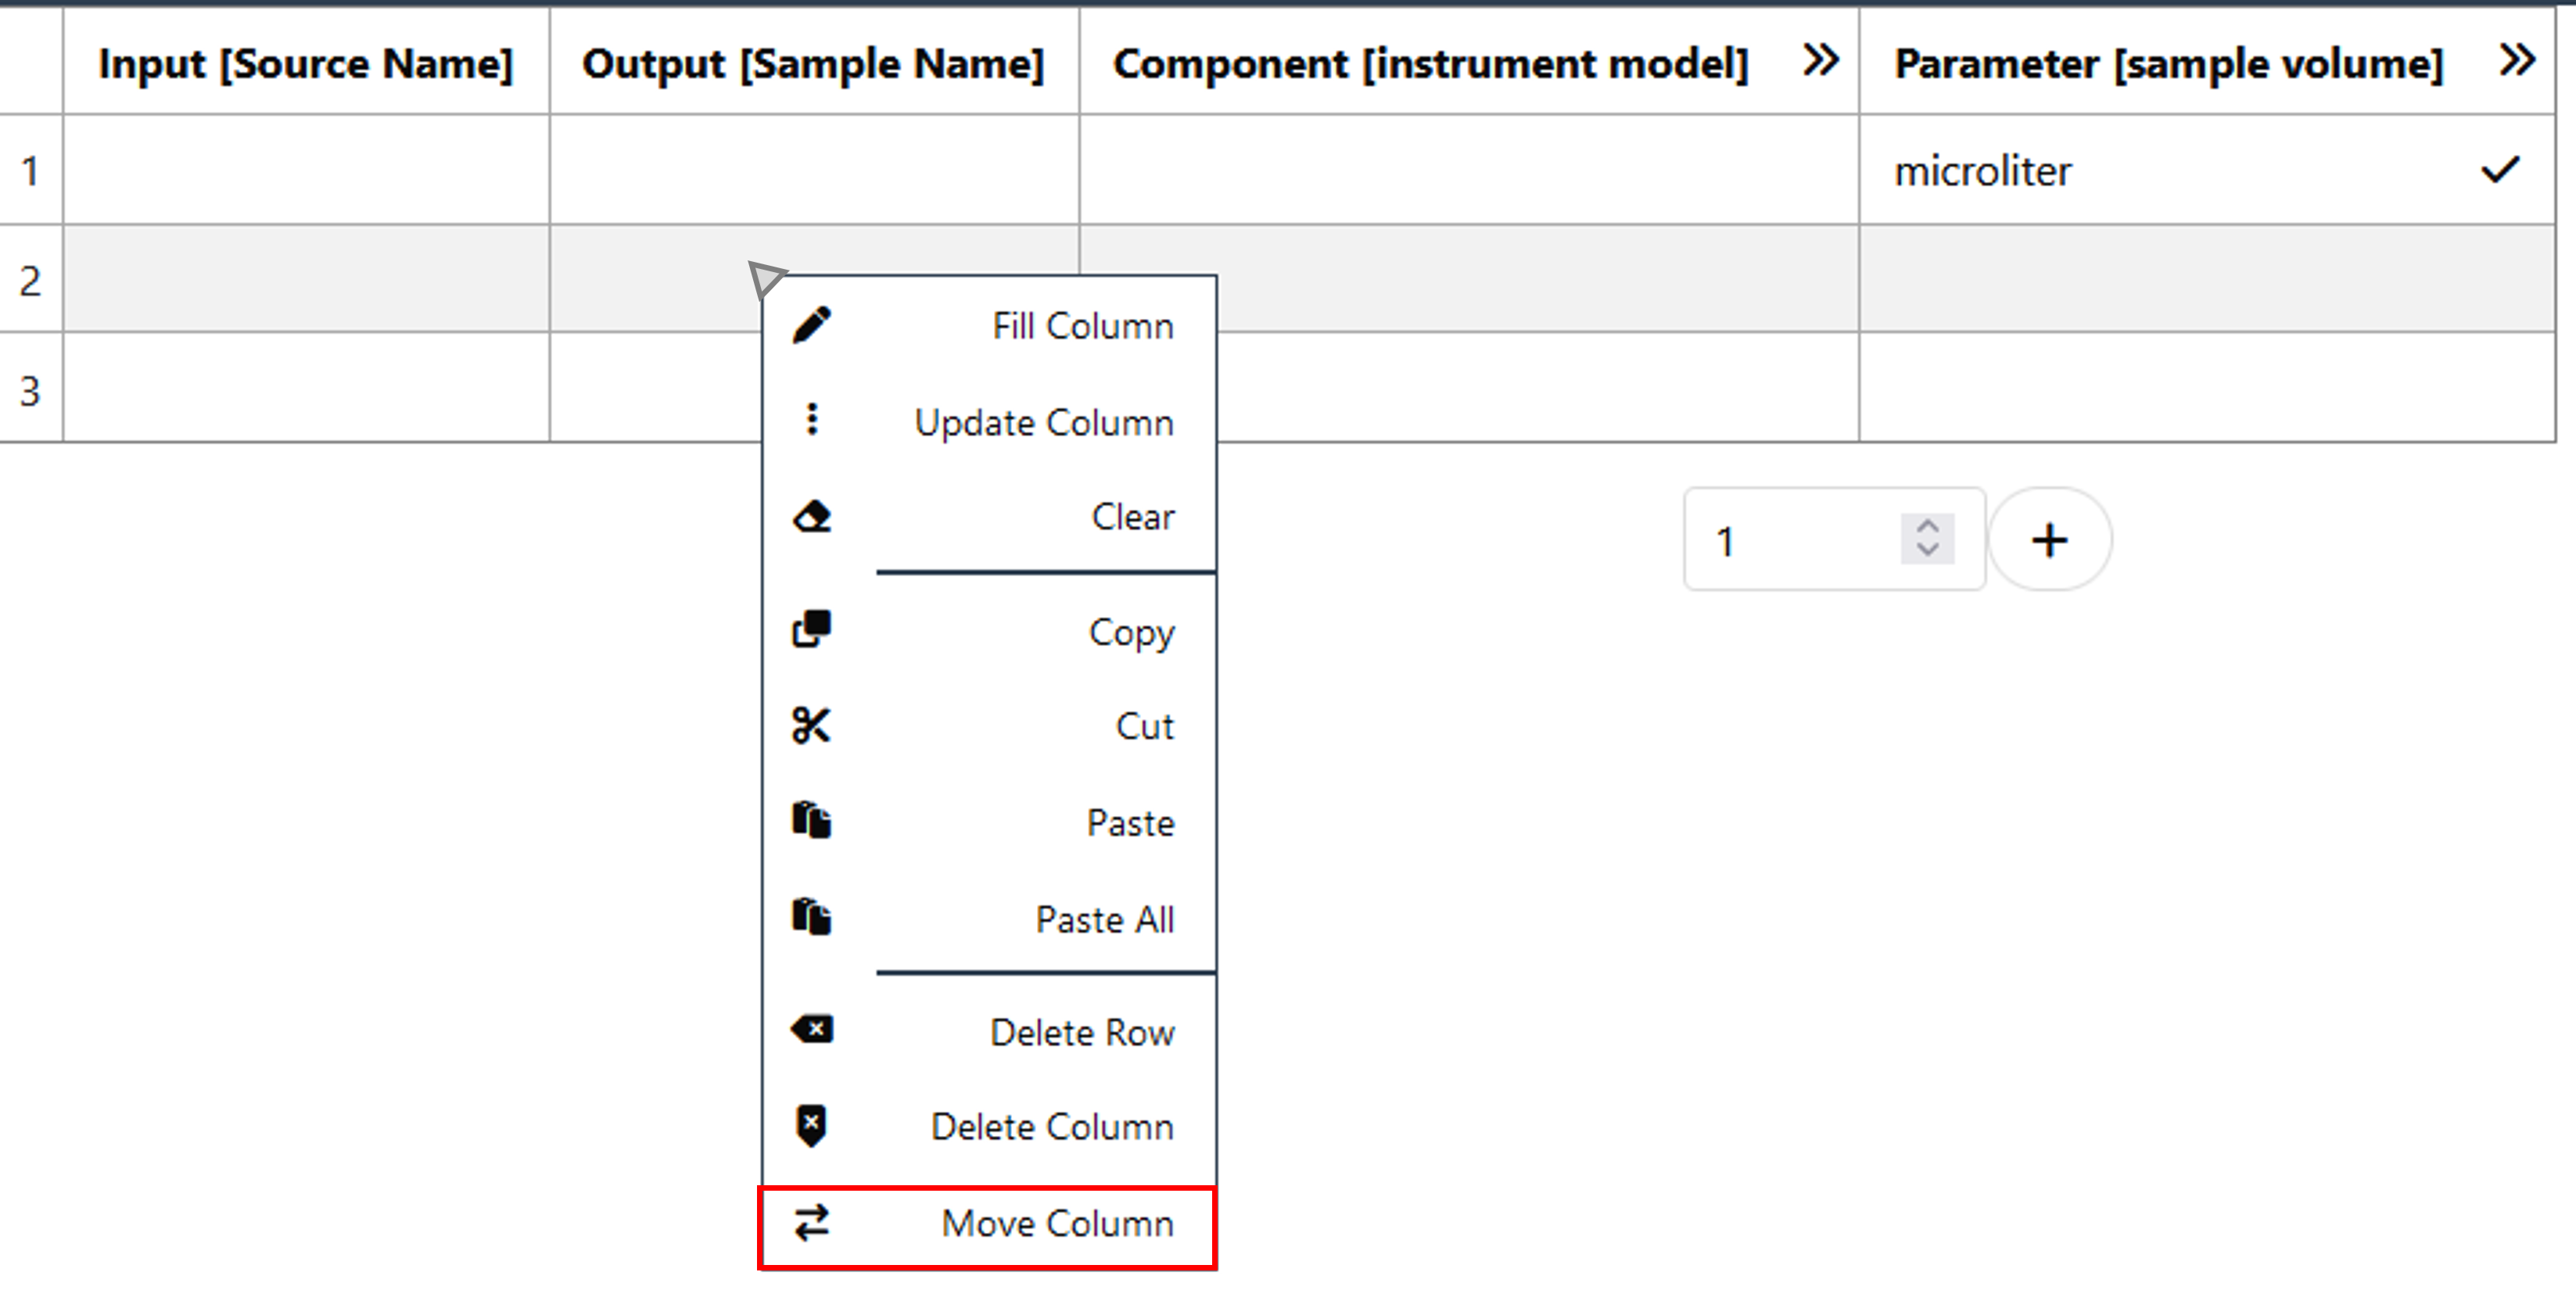
We now want to move the Output column to the end of your table. For this, right-click into any cell (except the header) of the column that you want to move. Now you can click "Move Column" and select the position that the column should be moved to (in this case: 3). If your table does not contain empty cells yet, you can add any number of rows with the plus symbol. Right-clicking into cells also gives the option of deleting a column or row.

Use a template
  1. Use the "Add Template" widget on the top or navigate to "Templates" in the sidebar and click Browse database.

  2. Search for and select Proteomics MassSpec assay .

    • You will see a preview of all building blocks which are part of this template.
  3. Click Add template to add all building blocks from the template to your table, which do not exist yet.

If there are any building blocks which do not fit your experiment you can delete the columns as described above.

Your ISA table is ready to fill 🎉

Go ahead, adjust the building blocks you want to use to describe your experiment as you see fit. Insert values for Input and Output and fill the cells of your Parameter, Characteristic or Component columns using the ontology term search. You can activate the ontology term search directly in the cells of your table with the magnifying glass symbol or you can use the "Ontology term search" in the side bar. Instructions for annotating your data can also be found in the Swate Quickstart and in the Swate Manual (Filling cells with ontology terms).

DataPLANT Support

Besides these technical solutions, DataPLANT supports you with community-engaged data stewardship. For further assistance, feel free to reach out via our helpdesk or by contacting us directly .
Contribution Guide 📖
✏️ Edit this page