
ARCitect
- Most stable
- Most feature complete
- Will be replaced in the future

So, where do I start? What is an ARC? And how do I create one?
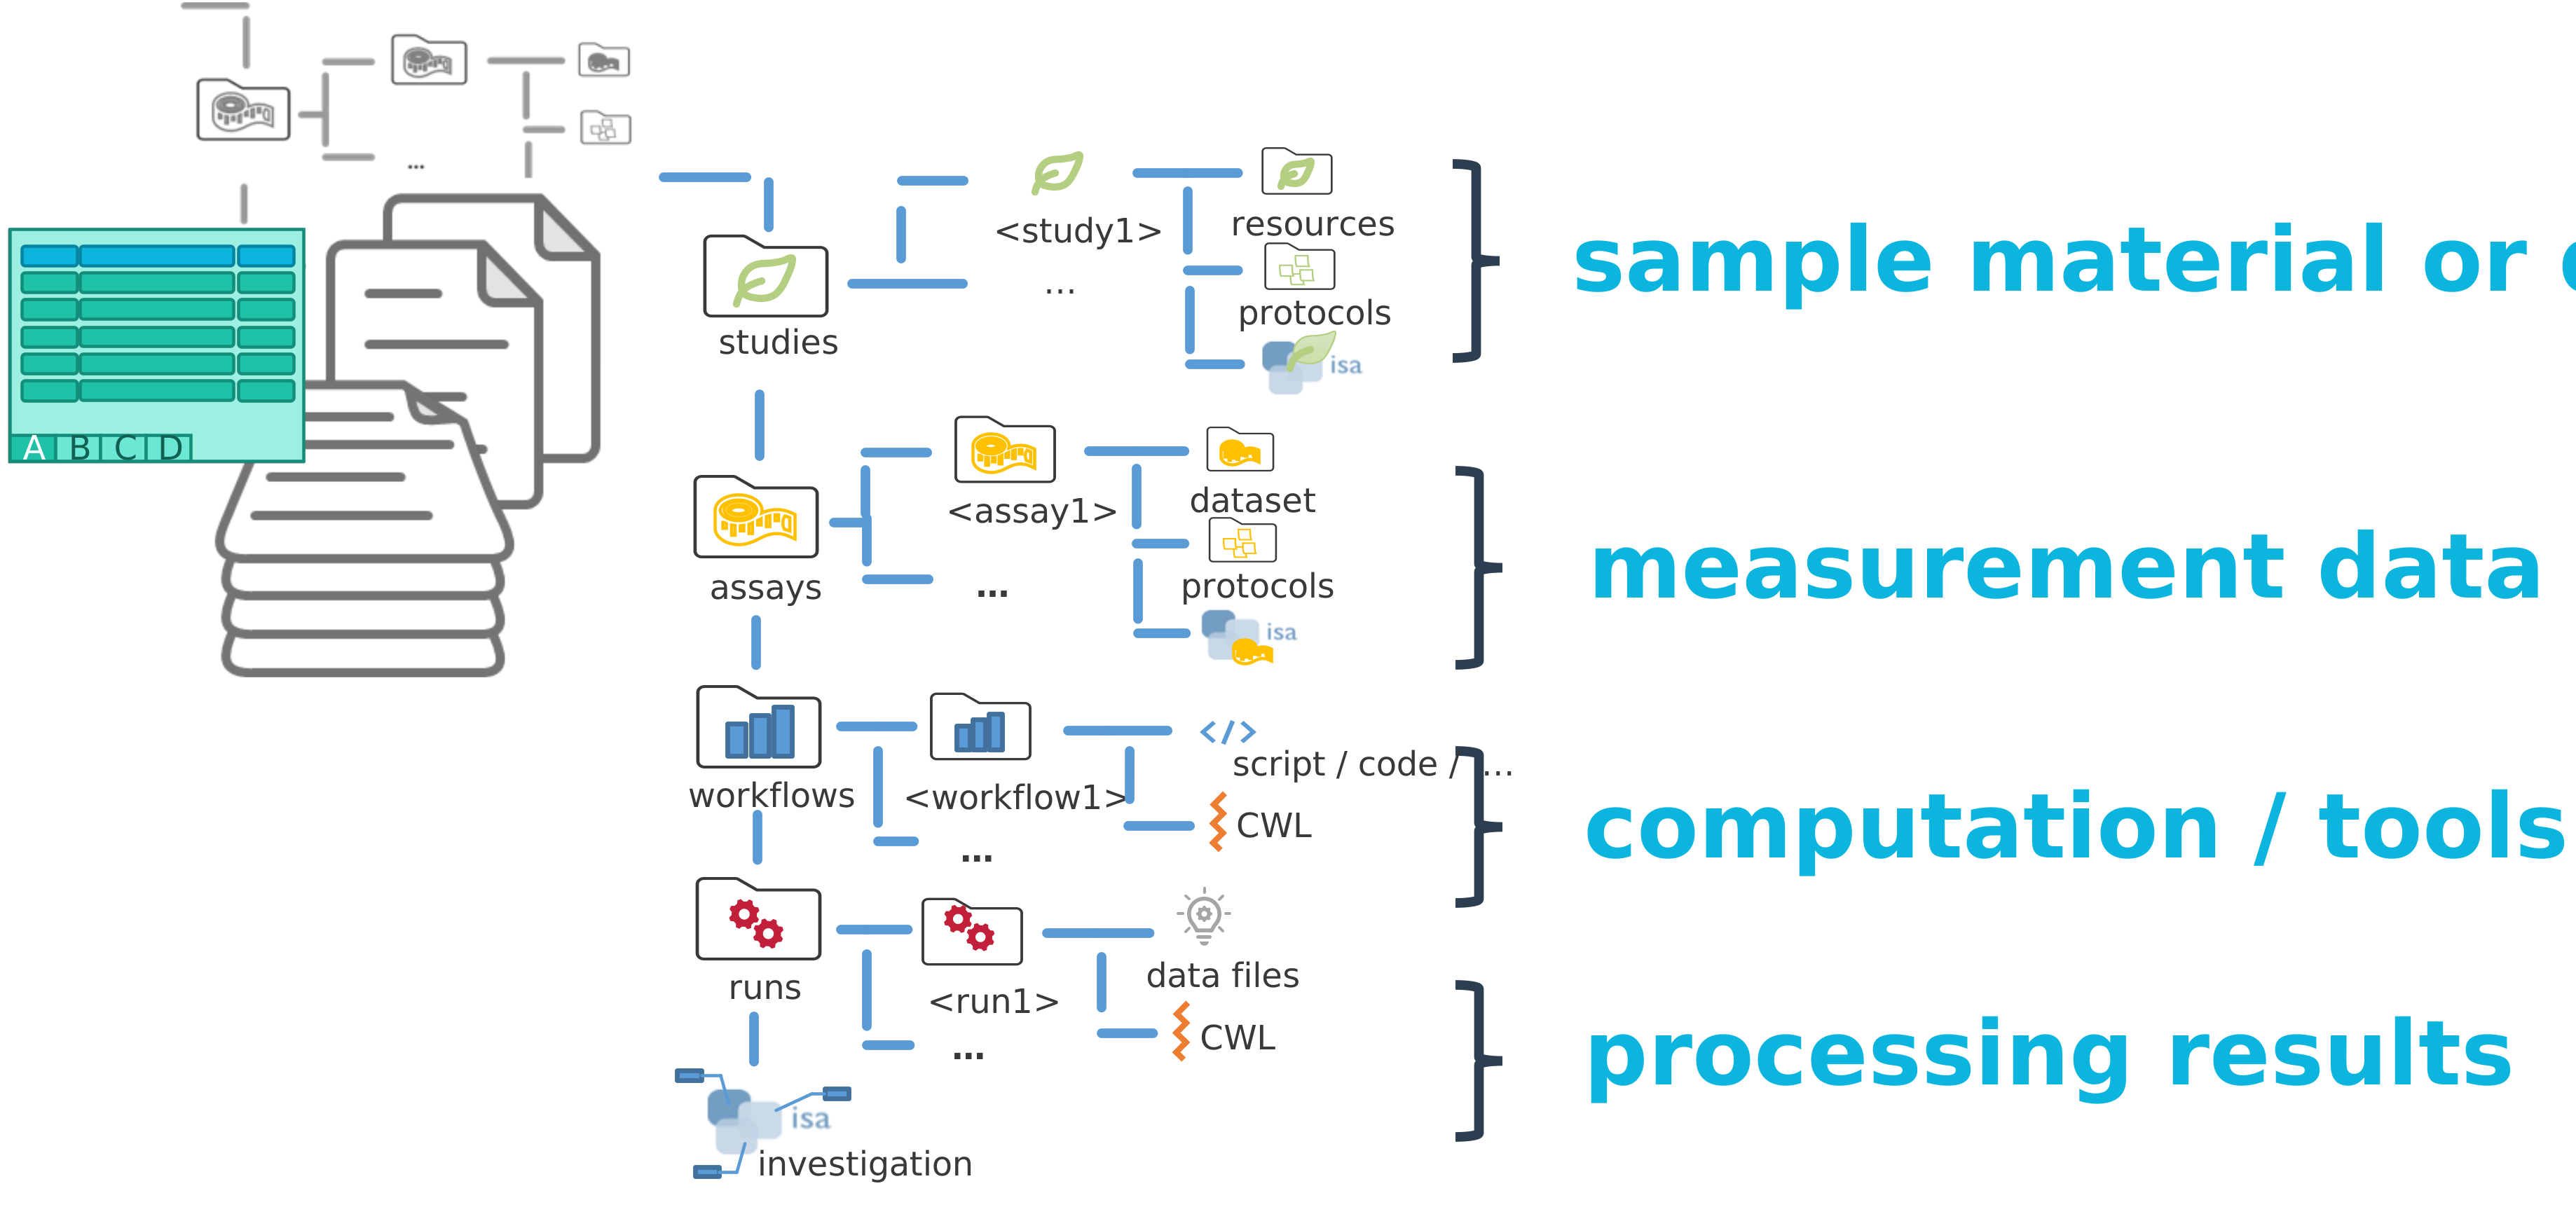
An ARC represents an entire investigation. At the top level, it includes directories named “studies,” “assays,” “workflows,” and “runs,” along with an investigation metadata table that holds all administrative metadata.
It follows a very specific structure to be easily readable by machines 🤖. While it can be created by hand it is faster to use some tooling!
The easiest way to create a new ARC is via one of the ARC tools provided by DataPLANT.
As of September 2026, two parallel ARC tools are being maintained as the main user tool.
ARCitect
ARCitect-GX
Choose and follow one of these tracks by selecting the respective tab in the following guides.
If ARCitect is not yet installed on your computer,
Head to the ARCitect’s GitHub release page.
Under “Assets” Download the latest release for Windows (ARCitect-x.x.x-win.zip).
In Windows Explorer, open the folder where you downloaded the ARCitect.
Unzip (Right click ➞ Extract All..) the folder (ARCitect-x.x.x-win.zip). You can move this folder to another location (e.g. Program files).
Start the ARCitect, by clicking the ARCitect application.
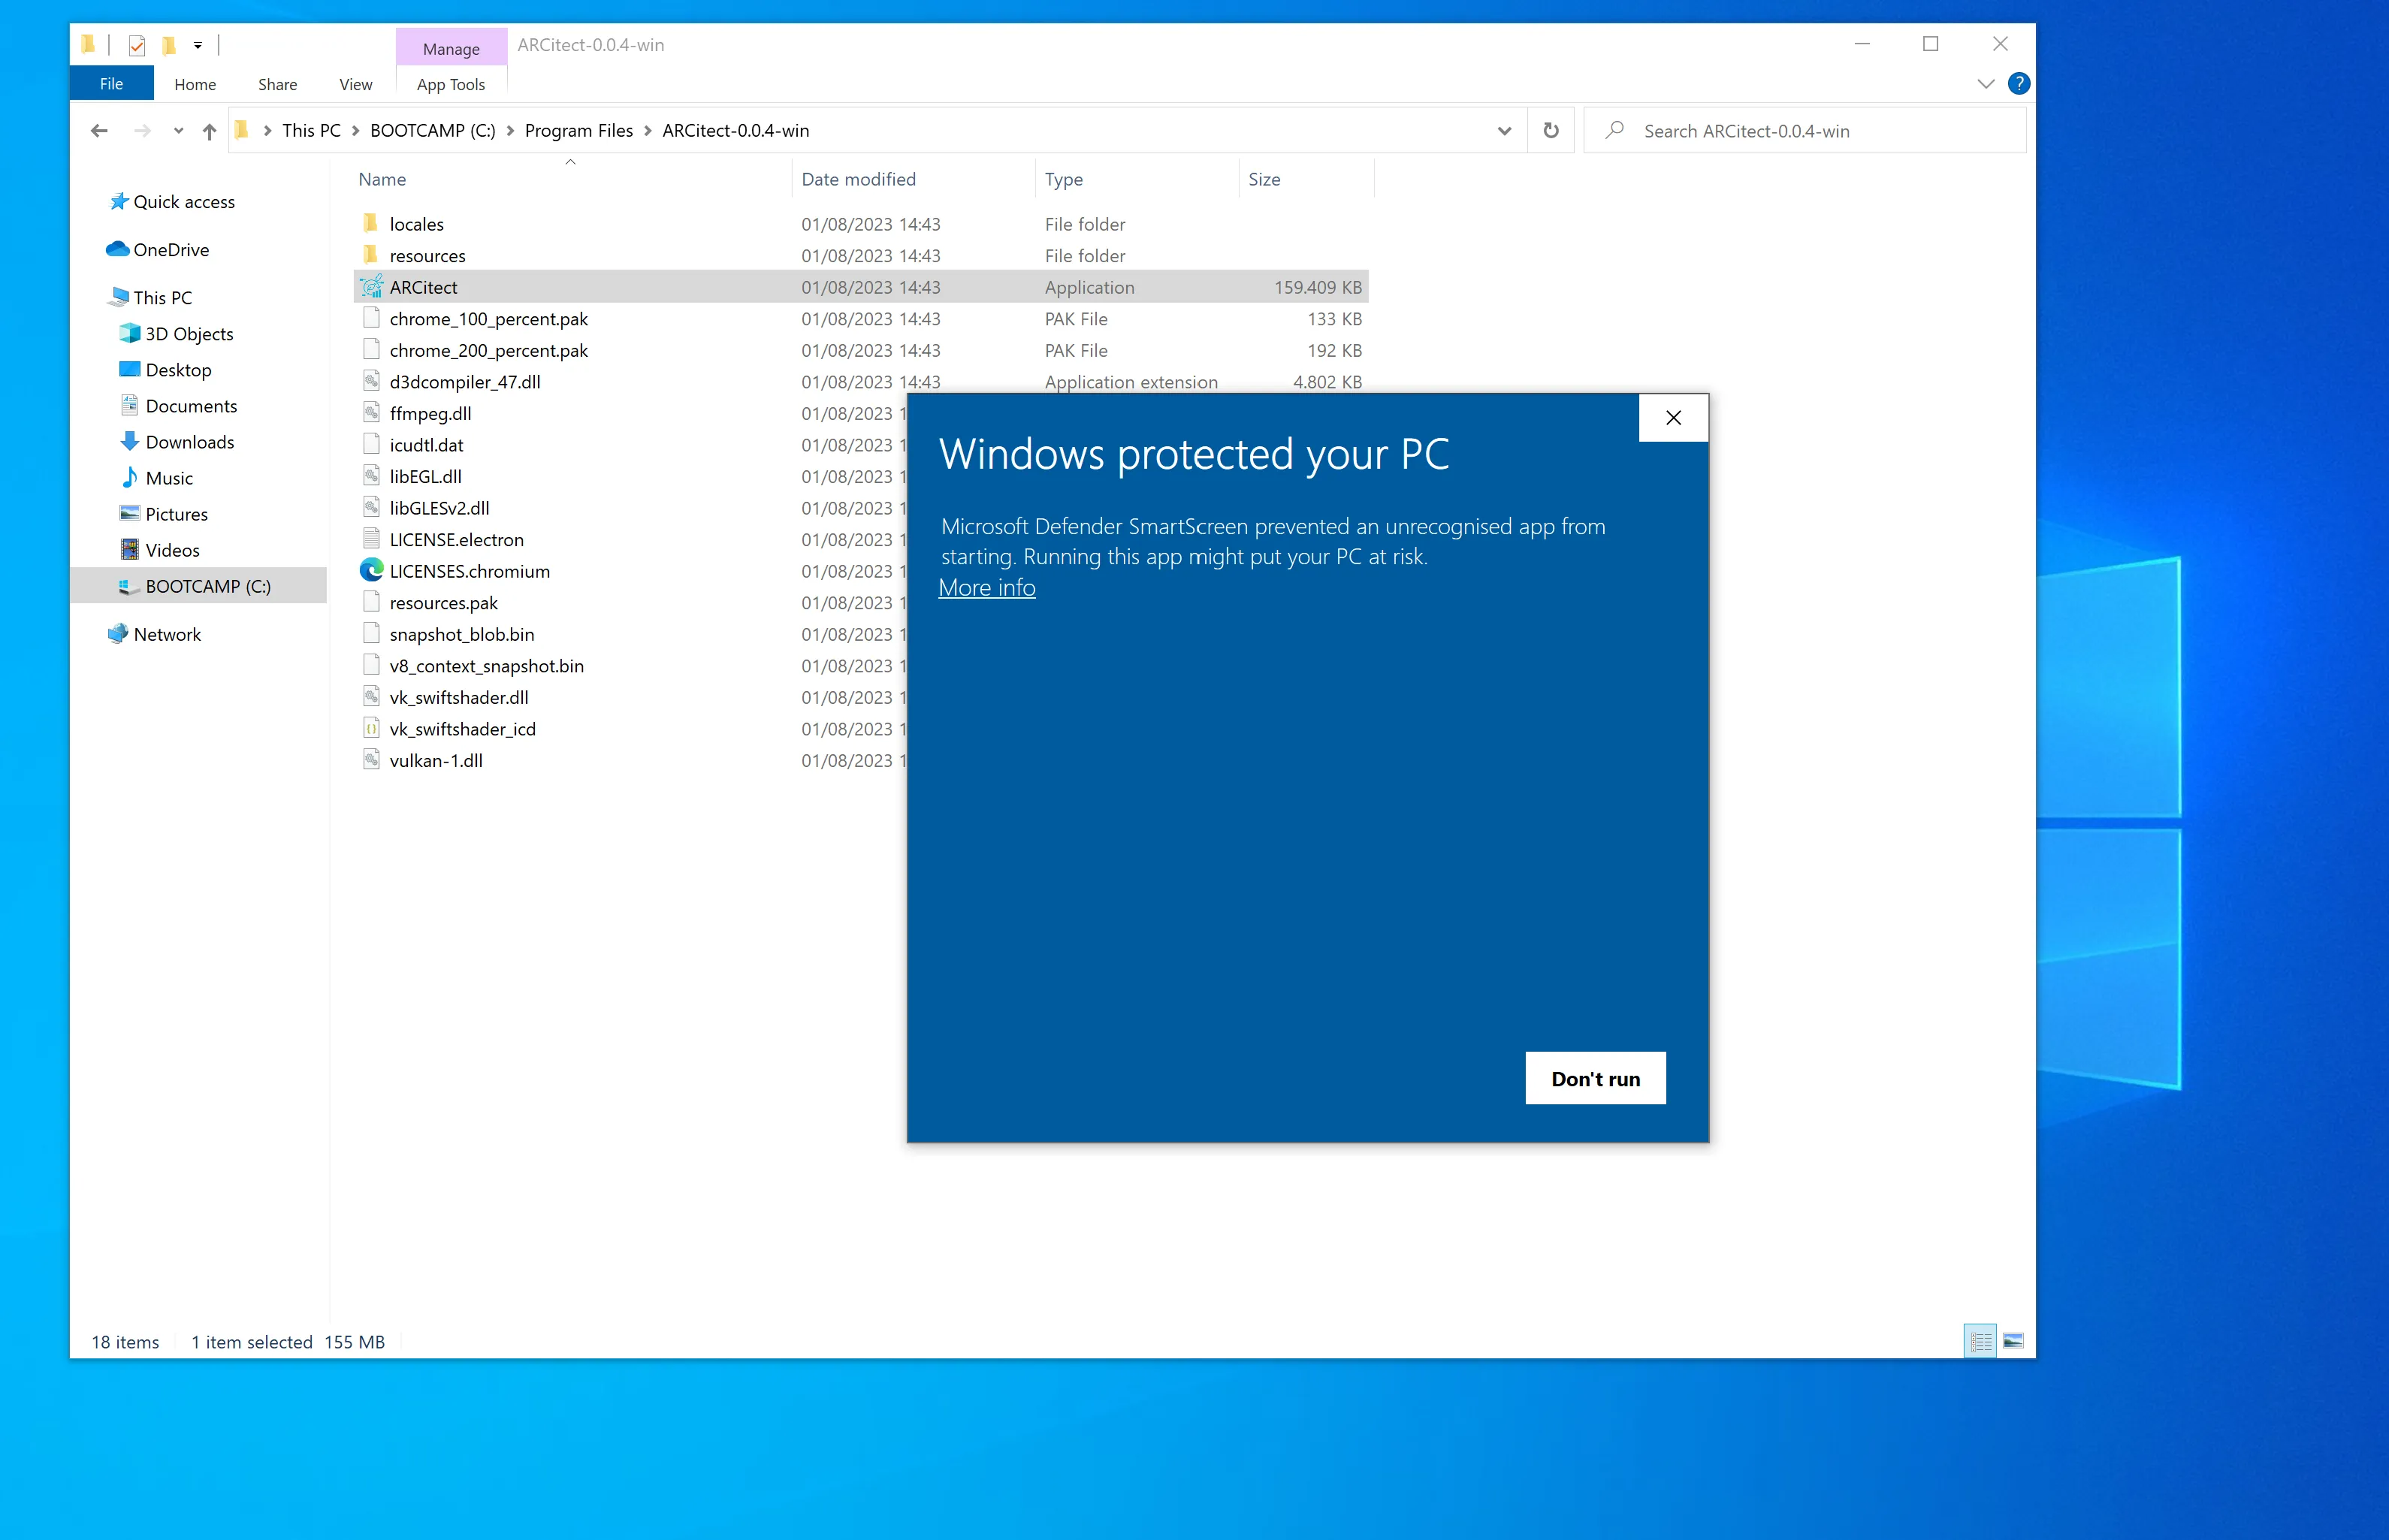
Once started, you see a Windows Defender warning. To proceed, click More info and then Run anyway.
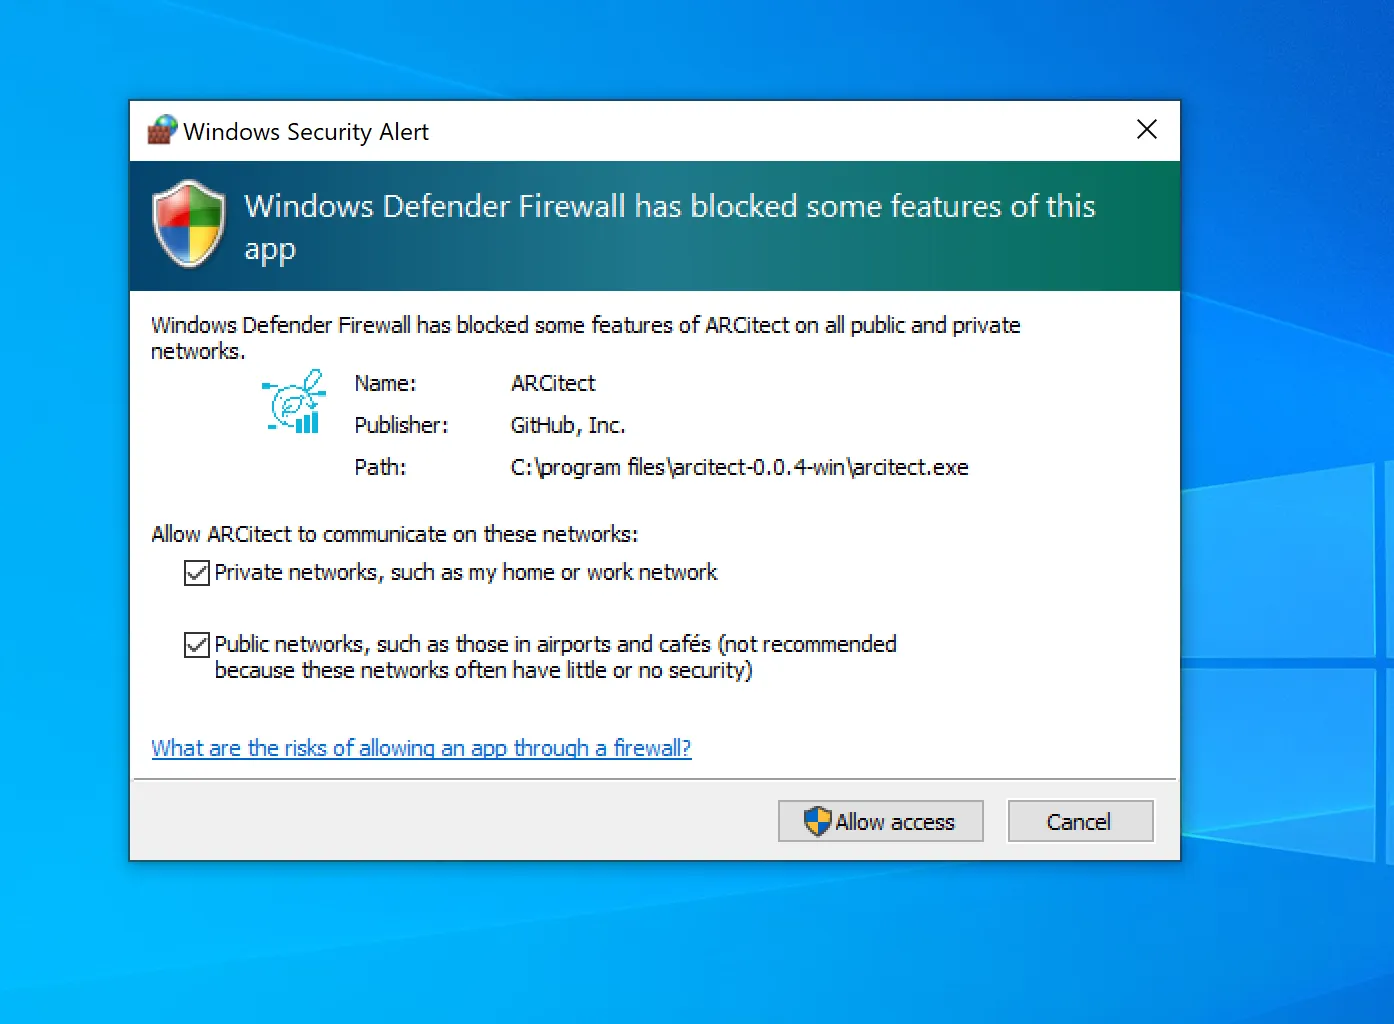
Windows Defender Firewall further asks you to allow network communication. This enables communication with the DataHUB.
To check, that Git and Git LFS are installed on your computer, open a new command prompt or terminal and execute the following two commands. These should display the installed version. If not, follow the installation instructions.
Open a command prompt or terminal
Check the installed Git version via
git --versionCheck the installed Git LFS version via
git-lfs --versionOpen a Terminal
(Optional, if homebrew is not yet installed:) Install the package manager homebrew via
/bin/bash -c "$(curl -fsSL https://raw.githubusercontent.com/Homebrew/install/HEAD/install.sh)"Install Git via homebrew with
brew install gitInstall Git LFS via homebrew with
brew install git-lfsInitialize Git LFS via
git lfs installOpen a Terminal
Update the package manager apt via
sudo apt updateInstall Git via apt with
sudo apt-get install gitInstall Git LFS via apt with
sudo apt-get install git-lfsInitialize Git LFS via
git lfs installHead to the ARCitect’s GitHub release page.
Download the macOS installer ARCitect-x.x.x.dmg.
Double-click the installer ARCitect-x.x.x.dmg and move the app to your Applications folder.
When starting ARCitect for the first time, you are warned about an unidentified developer.
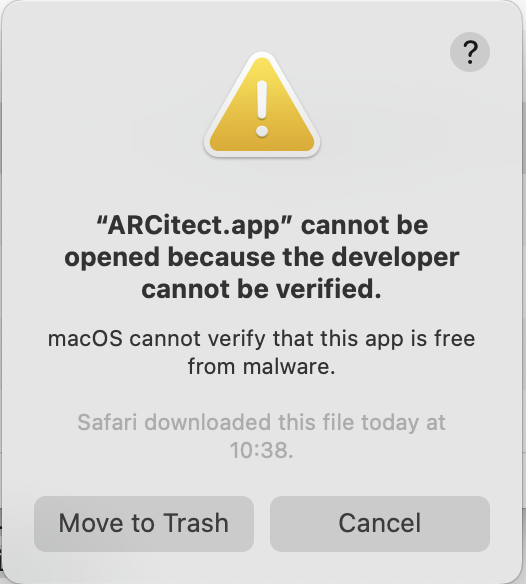
Please navigate to the Privacy & Security panel in your System Settings to Open Anyway.
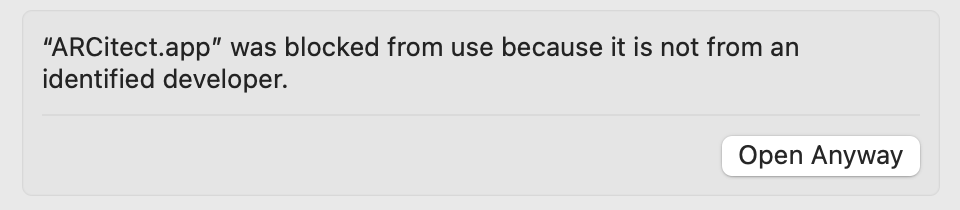
Every time you start the ARCitect, you are asked to accept incoming network connections.
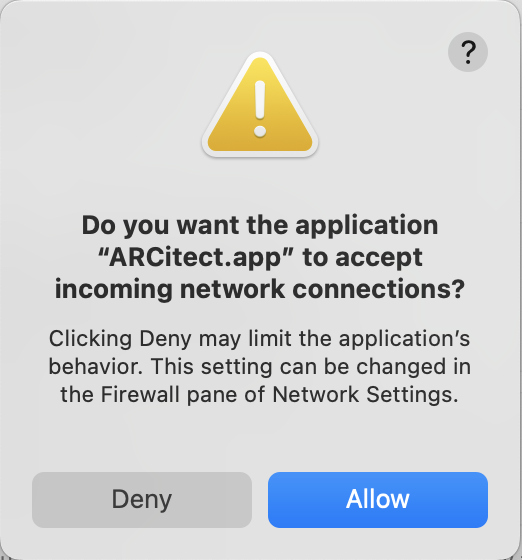
This enables communication with the DataHUB.
To check, that Git and Git LFS are installed on your computer, open a new command prompt or terminal and execute the following two commands. These should display the installed version. If not, follow the installation instructions.
Open a command prompt or terminal
Check the installed Git version via
git --versionCheck the installed Git LFS version via
git-lfs --versionOpen a Terminal
(Optional, if homebrew is not yet installed:) Install the package manager homebrew via
/bin/bash -c "$(curl -fsSL https://raw.githubusercontent.com/Homebrew/install/HEAD/install.sh)"Install Git via homebrew with
brew install gitInstall Git LFS via homebrew with
brew install git-lfsInitialize Git LFS via
git lfs installOpen a Terminal
Update the package manager apt via
sudo apt updateInstall Git via apt with
sudo apt-get install gitInstall Git LFS via apt with
sudo apt-get install git-lfsInitialize Git LFS via
git lfs installInstall additional dependencies via
sudo apt-get updatesudo apt-get install libgtk-3-0 libnotify4 xdg-utils libsecret-1-0Head to the ARCitect’s GitHub release page.
Download the Linux DEB package ARCitect-x.x.x_amd64.deb.
Install ARCitect
sudo dpkg -i ./ARCitect-x.x.x_amd64.debStart the ARCitect via
arcitectIf ARCitect-GX is not yet installed on your computer,
ARCitect-GX depends on Git and Git LFS. If not already installed, these need to be installed separately.
Open a Terminal
(Optional, if homebrew is not yet installed:) Install the package manager homebrew via
/bin/bash -c "$(curl -fsSL https://raw.githubusercontent.com/Homebrew/install/HEAD/install.sh)"Install Git via homebrew with
brew install gitInstall Git LFS via homebrew with
brew install git-lfsInitialize Git LFS via
git lfs installOpen a Terminal
Update the package manager apt via
sudo apt updateInstall Git via apt with
sudo apt-get install gitInstall Git LFS via apt with
sudo apt-get install git-lfsInitialize Git LFS via
git lfs installHead to the ARCitect-GX’s GitHub release page.
Under “Assets” Download the latest release for Windows (Swate-x.x.x Setup.exe).
In Windows Explorer, open the folder where you downloaded the ARCitect-GX and move the app (Swate-x.x.x Setup.exe) to another location (e.g. Program files).
Start the ARCitect-GX, by clicking the Swate application.
Once started, you see a Windows Defender warning. To proceed, click More info and then Run anyway.
Windows Defender Firewall further asks you to allow network communication. This enables communication with the DataHUB.
Head to the ARCitect-GX’s GitHub release page.
Download the macOS installer Swate-x.x.x.dmg for your platform (Intel: x64 or Apple Silicon: arm64).
Double-click the installer Swate-x.x.x.dmg and move the app to your Applications folder.
When starting ARCitect-GX for the first time, you are warned about an unidentified developer.
Please navigate to the Privacy & Security panel in your System Settings to Open Anyway.
Every time you start the ARCitect-GX, you are asked to accept incoming network connections.
This enables communication with the DataHUB.
Install additional dependencies via
sudo apt-get updatesudo apt-get install libgtk-3-0 libnotify4 xdg-utils libsecret-1-0Head to the ARCitect-GX’s GitHub release page.
Download the Linux DEB package Swate-x.x.x_amd64.deb.
Install ARCitect-GX
sudo dpkg -i ./Swate-x.x.x_amd64.debStart the ARCitect-GX via
swateStart the ARCitect app.
In the sidebar on the left, click on note_add New ARC.
Select a location and name for your ARC.
To keep it simple, I call my ARC “AthalianaColdStressSugar”
ARCitect creates the base ARC folder on your computer and opens it right away.
Start the ARCitect-GX app.
In the dropdown on top click on “Create new ARC”.
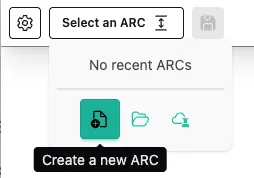
Select an identifier for your ARC.
To keep it simple, I call my ARC “AthalianaColdStressSugar”
Click Create new ARC
Select a location and click “open”.
ARCitect-GX creates the base ARC folder on your computer and opens it right away.