
ARC Commander QuickStart
This guide introduces the ARC Commander, a command line tool to create, edit and share you ARC. It requires some experience with the command line (command prompt, shell, terminal,…).
Before using the ARC commander, please install Git, Git-LFS and ARC Commander and setup access to your DataHUB account.
-
Install and setup Git and Git-LFS
Before using ARCitect (except for Windows) or ARC Commander, Git and Git LFS must be installed.
Section titled Download and install Git and Git LFSDownload and install Git and Git LFS
Section titled “Download and install Git and Git LFS”- Download the Git installer for Windows from https://git-scm.com.
- Open the installer and follow the installation instructions
- During the installation, make sure to include Git LFS (Large File Support)
-
Open a Terminal
-
(Optional, if homebrew is not yet installed:) Install the package manager homebrew via
Terminal window /bin/bash -c "$(curl -fsSL https://raw.githubusercontent.com/Homebrew/install/HEAD/install.sh)" -
Install Git via homebrew with
Terminal window brew install git -
Install Git LFS via homebrew with
Terminal window brew install git-lfs -
Initialize Git LFS via
Terminal window git lfs install
-
Open a Terminal
-
Update the package manager apt via
Terminal window sudo apt update -
Install Git via apt with
Terminal window sudo apt-get install git -
Install Git LFS via apt with
Terminal window sudo apt-get install git-lfs -
Initialize Git LFS via
Terminal window git lfs install
Section titled Check your Git installationCheck your Git installation
Section titled “Check your Git installation”To check, that Git and Git LFS are installed on your computer, open a new command prompt or terminal and execute the following two commands. These should display the installed version. If not, follow the installation instructions.
-
Open a command prompt or terminal
-
Check the installed Git version via
Terminal window git --version -
Check the installed Git LFS version via
Terminal window git-lfs --version
Section titled Configure Git UserConfigure Git User
Section titled “Configure Git User”Git always signs “commits” with a user
nameande-mail address. These are then also used by the DataHUB to associate the commits to your user account.To add your user name and email address to the git configuration on your computer, run the following two commands in a command prompt or terminal. Make sure to replace “Your DataHUB Name” and “Your DataHUB Email Address” with your information from the DataHUB.
- Your name
Terminal window git config --global user.name "Your DataHUB Name"- Your email address
Terminal window git config --global user.email "Your DataHUB Email Address"Section titled Check your Git configurationCheck your Git configuration
Section titled “Check your Git configuration”Run this command to display your user configuration
Terminal window git config --global --get-regexp userSection titled Enable Git to store credentials on your computerEnable Git to store credentials on your computer
Section titled “Enable Git to store credentials on your computer”To avoid having to type in your DataHUB credentials, you can enable to store the information (e.g. a DataHUB password or token) on your computer. This leverages the password manager of you operating system.
-
Open a command prompt or powershell
-
Execute the following command
Terminal window git config --global credential.helper store
-
Open a terminal
-
Execute the following command
Terminal window git config --global credential.helper osxkeychain
-
Open a terminal
-
Execute the following command
Terminal window git config --global credential.helper store
-
Install ARC Commander
Before using ARCitect (except for Windows) or ARC Commander, Git and Git LFS must be installed.
Section titled Download and install Git and Git LFSDownload and install Git and Git LFS
Section titled “Download and install Git and Git LFS”- Download the Git installer for Windows from https://git-scm.com.
- Open the installer and follow the installation instructions
- During the installation, make sure to include Git LFS (Large File Support)
-
Open a Terminal
-
(Optional, if homebrew is not yet installed:) Install the package manager homebrew via
Terminal window /bin/bash -c "$(curl -fsSL https://raw.githubusercontent.com/Homebrew/install/HEAD/install.sh)" -
Install Git via homebrew with
Terminal window brew install git -
Install Git LFS via homebrew with
Terminal window brew install git-lfs -
Initialize Git LFS via
Terminal window git lfs install
-
Open a Terminal
-
Update the package manager apt via
Terminal window sudo apt update -
Install Git via apt with
Terminal window sudo apt-get install git -
Install Git LFS via apt with
Terminal window sudo apt-get install git-lfs -
Initialize Git LFS via
Terminal window git lfs install
Section titled Check your Git installationCheck your Git installation
Section titled “Check your Git installation”To check, that Git and Git LFS are installed on your computer, open a new command prompt or terminal and execute the following two commands. These should display the installed version. If not, follow the installation instructions.
-
Open a command prompt or terminal
-
Check the installed Git version via
Terminal window git --version -
Check the installed Git LFS version via
Terminal window git-lfs --version
Section titled Configure Git UserConfigure Git User
Section titled “Configure Git User”Git always signs “commits” with a user
nameande-mail address. These are then also used by the DataHUB to associate the commits to your user account.To add your user name and email address to the git configuration on your computer, run the following two commands in a command prompt or terminal. Make sure to replace “Your DataHUB Name” and “Your DataHUB Email Address” with your information from the DataHUB.
- Your name
Terminal window git config --global user.name "Your DataHUB Name"- Your email address
Terminal window git config --global user.email "Your DataHUB Email Address"Section titled Check your Git configurationCheck your Git configuration
Section titled “Check your Git configuration”Run this command to display your user configuration
Terminal window git config --global --get-regexp userSection titled Enable Git to store credentials on your computerEnable Git to store credentials on your computer
Section titled “Enable Git to store credentials on your computer”To avoid having to type in your DataHUB credentials, you can enable to store the information (e.g. a DataHUB password or token) on your computer. This leverages the password manager of you operating system.
-
Open a command prompt or powershell
-
Execute the following command
Terminal window git config --global credential.helper store
-
Open a terminal
-
Execute the following command
Terminal window git config --global credential.helper osxkeychain
-
Open a terminal
-
Execute the following command
Terminal window git config --global credential.helper store
-
Register for a DataPLANT account
With a DataPLANT account you can use the DataHUB and share your ARC for collaboration.
Please register here.
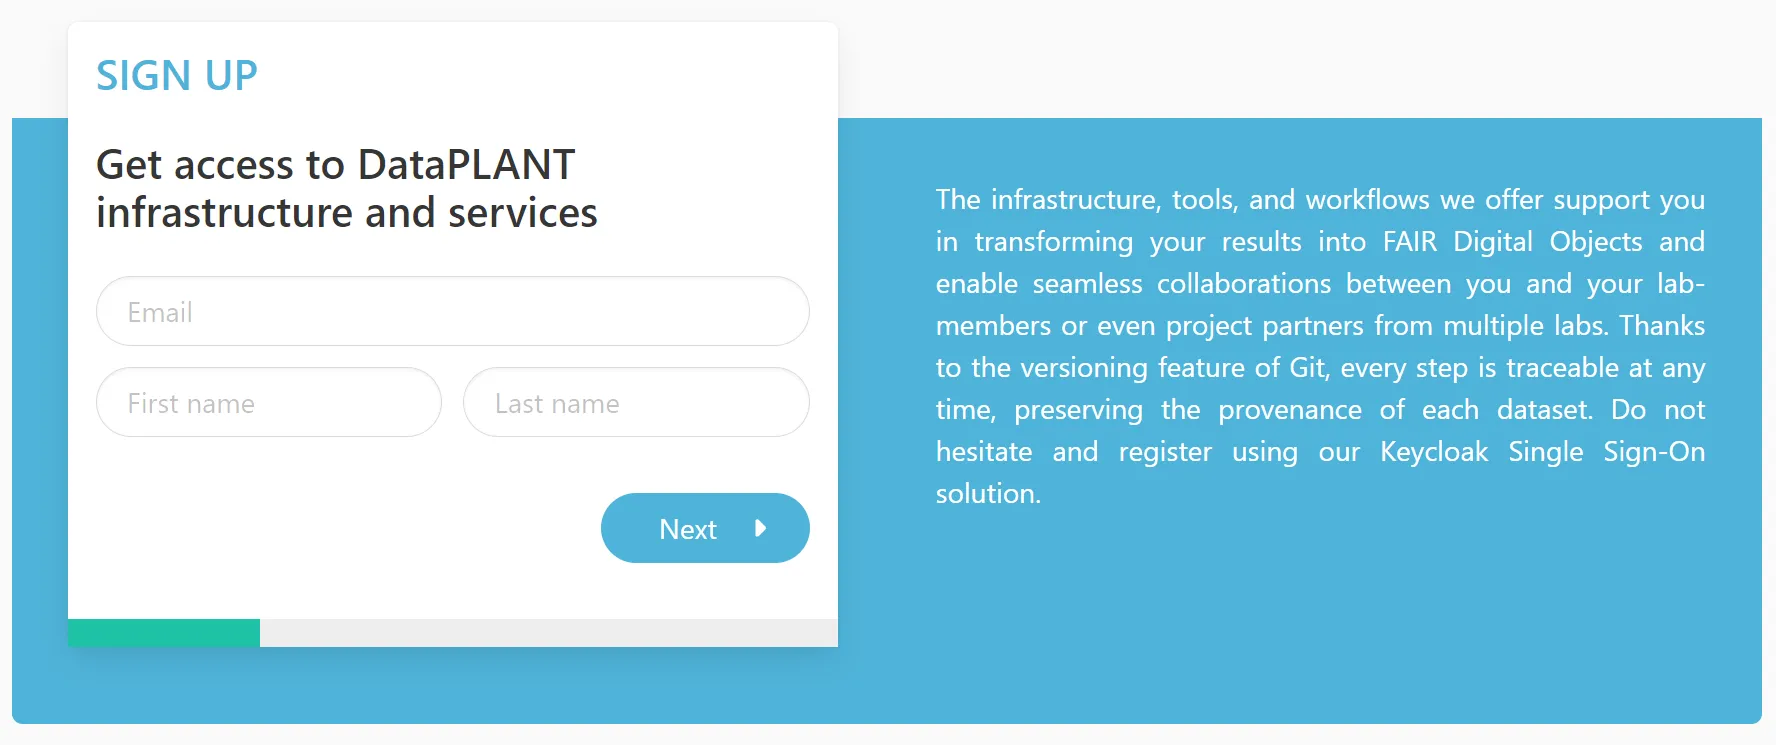
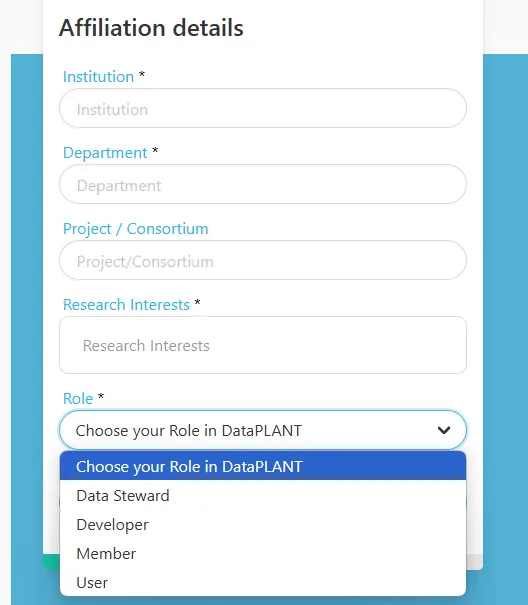
During the registration you can “Choose your role in DataPLANT”:
- DataSteward
- Member of / associated to DataPLANT
- Teaches DataPLANT tools and services to community members
- Developer
- Member of / associated to DataPLANT
- Develops DataPLANT tools and services
- Member
- Other member of DataPLANT
- User
- User who want to use the DataPLANT tools and services
 Section titled DataPLANT account settings
DataPLANT account settings
Section titled “DataPLANT account settings”If you want to adjust your account settings, simply click the login icon in the navigation bar on this site.
- In the tab “Password” you can modify your password.
- In the tab “Authenticator” you can set up Two Factor Authentication (2FA).
- DataSteward
-
Setup DataHUB access
The DataHUB allows you to share your ARCs with registered lab or project partners. After registration, you need to setup the ARC Commander for smooth ARC synchronization between your computer and the DataHUB.
Section titled Enable Git to store credentials on your computerEnable Git to store credentials on your computer
Section titled “Enable Git to store credentials on your computer”To avoid having to type in your DataHUB credentials, you can enable to store the information (e.g. a DataHUB password or token) on your computer. This leverages the password manager of you operating system.
-
Open a command prompt or powershell
-
Execute the following command
Terminal window git config --global credential.helper store
-
Open a terminal
-
Execute the following command
Terminal window git config --global credential.helper osxkeychain
-
Open a terminal
-
Execute the following command
Terminal window git config --global credential.helper store
Section titled Receive and store a DataHUB access tokenReceive and store a DataHUB access token
Section titled “Receive and store a DataHUB access token”Terminal window arc remote accesstoken get -s https://git.nfdi4plants.orgA browser window will open asking for your DataPLANT login. After login you are asked to authorize your computer to communicate with the DataHUB. In case you are already logged in, the browser will directly display a plain
Successmessage to you.Section titled Store a configurable DataHUB access token for your projectStore a configurable DataHUB access token for your project
Section titled “Store a configurable DataHUB access token for your project”Access tokens created with the ARCommander expire after two hours. To create a longer-lasting access token for your project, follow these steps:
-
Create a project access token
-
Sign in to the DataHUB
-
Open your Project (ARC)
-
Navigate to the ARC’s settings
-
Open the
Access Tokenssettings in the sidebar(1) -
Enter or adapt the required token information
(2)(more about token information here) -
Click
Create project access token (3)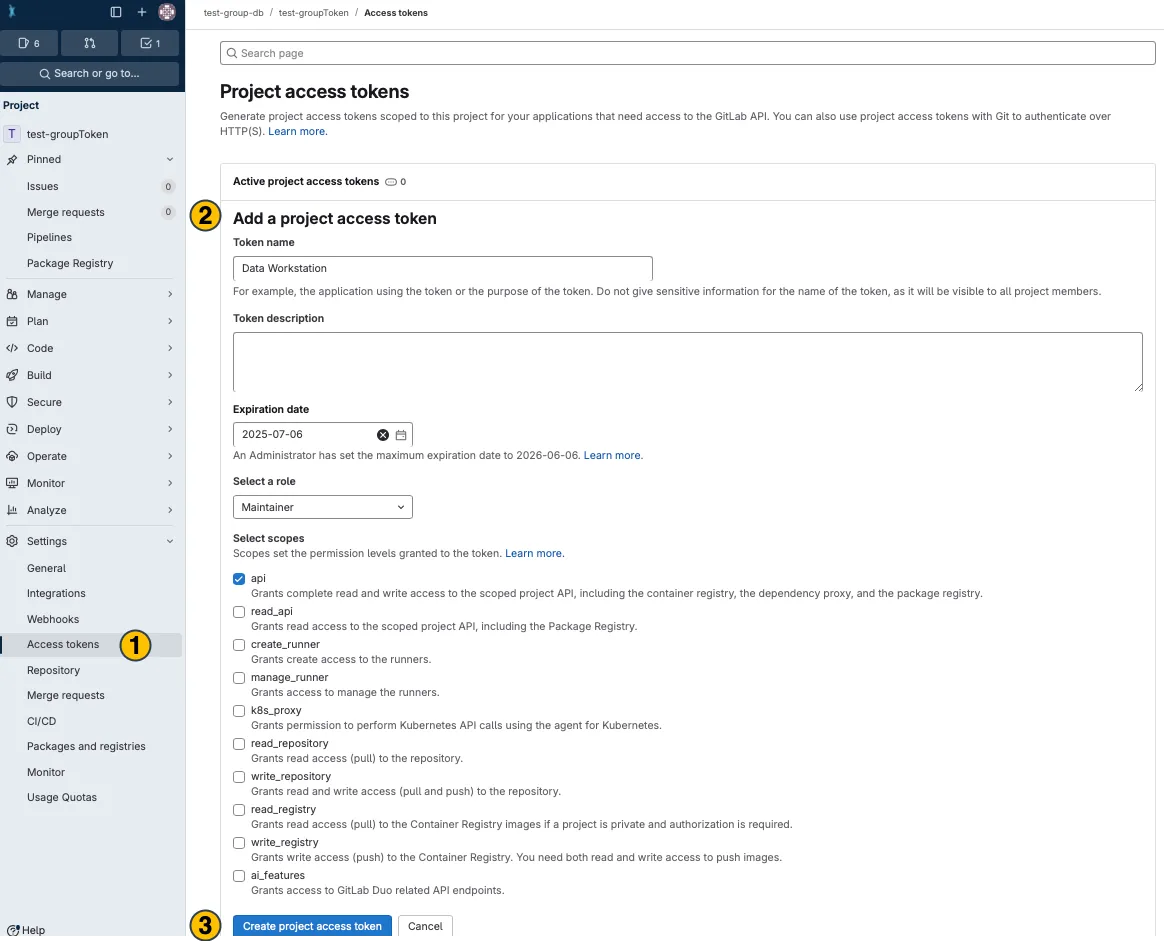
-
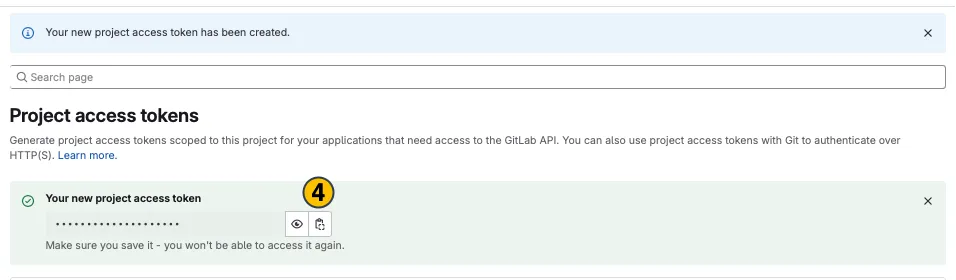
Your new project access token appears on top. Copy (4) and use it in the desired application.
-
-
Store the token in your local ARC
Terminal window arc remoteaccess accesstoken store --token <replaceWithYourToken>
Once set up, you will not need to authenticate yourself (e.g., by manually retrieving a token through ‘arc remote token get’) until the token expires. When switching to another machine you have to repeat the process.
-
Initialize your ARC
Section titled “Initialize your ARC”-
Create and navigate to a local folder, which you want to initialize as an ARC, e.g. via file explorer or
Terminal window mkdir AthalianaColdStressSugarcd AthalianaColdStressSugar -
Initialize your ARC by executing
Terminal window arc init
This created the general ARC folder structure:
- studies
- assays
- workflows
- runs
- isa.investigation.xlsx
Add investigation metadata
Section titled “Add investigation metadata”-
Add an investigation identifier (
-ior--investigationidentifier)Terminal window arc investigation update -i AthalianaColdStressSugar -
Add a Title
Terminal window arc investigation --title "Arabidopsis thaliana cold acclimation" -
Add a Description
Terminal window arc i --description "This experiment investigates the response of Arabidopsis thaliana to cold stress by subjecting plants to low-temperature conditions and monitoring physiological, molecular, and growth-related changes. Cold-treated plants are compared with control groups grown under optimal conditions to assess stress-related markers such as changes in protein abundance, sugar content, and growth rates. The goal is to identify key molecules and physiological responses involved in cold tolerance, contributing to the understanding of plant stress adaptation mechanisms." -
Add Contacts
Terminal window arc i person register -f Jasmine -l Beetrootarc i person register -f Oliver -l Sagearc i person register -f Viola -l Canina --email viola@plantscience.xyz
Add studies and assays
Section titled “Add studies and assays”-
Add a study with an identifier (
-s,--assayidentifier)Terminal window arc study add -s AthalianaColdStress -
Add assays with an identifier (
-a,--assay)Terminal window arc assay add -s AthalianaColdStress -a SugarMeasurementarc assay add -s AthalianaColdStress -a Proteomics_MSarc assay add -s AthalianaColdStress -a Proteomics_DataAnalysis
The ARC Commander will add subdirectories to the studies and assays folders. Your ARC should look similar to this now:
Directorystudies
DirectoryAthalianaColdStress
- resources
- protocols
- isa.study.xlsx
- …
Directoryassays
DirectorySugarMeasurement
- dataset
- protocols
- isa.assay.xlsx
- …
Directoryworkflows
- …
Directoryruns
- …
- isa.investigation.xlsx
Sync with the DataHUB
Section titled “Sync with the DataHUB”-
Synchronize your ARCs with the DataHUB using the command
Terminal window arc sync -
If you did not connect your local ARC with a remote one so far, you can specify the remote address (
-ror--remote) followed by the DataHUB URL, e.g.,Terminal window arc sync -r https://git.nfdi4plants.org/<YourUserName>/<YourARC> -
If no ARC exists under the given URL, you can force (
-for--force) the ARC Commander to create it.Terminal window arc sync -f -
Check if the upload was successful by visiting your ARC at the respective URL in your browser.
The ARC Commander comes with a leveled help menu, that suggests suitable inputs on every level of command or subcommand. You can simply add -h or --help at the end of an ARC Commander action to display the respective help menu.
Some examples:
arc --helparc investigation --harc investigation create --helparc study --harc study add --helparc assay remove --helpHere we only introduced the basic functions. After concluding this quickstart, you might want to explore the ARC Commander manual for a more detailed usage instruction.
In order to annotate the data in your ARC, explore the sections on studies and assays in the Getting Started guide. You can do this with ARCitect or Swate.